
When I moved to Florida in 2006, one of the first people I met was Joe. We both participated in the Disney College Program together and spent many, many hours living it up in the Disney parks!

Some photos from our College Program days back in 2006!
After the Disney College Program ended, I stayed in Florida – and Joe returned home to New York. But within a year or so, he was back in Florida and we’ve been able to continue our adventures ever since!

We still frequent the Disney Parks!
Joe’s thirtieth birthday was this past weekend. Of course, I also had to sew him a little somethin’ for his birthday. Sewing for ladies is so much easier than sewing for guys. Most of the fabrics and patterns I own are pretty girly and would be pretty awkward for a guy. So when I saw a tutorial for a “man bag” – sort of a toiletry bag for guys – of course, I had to try it. Joe travels a lot, so I know he can always use small bags for toiletries and such.
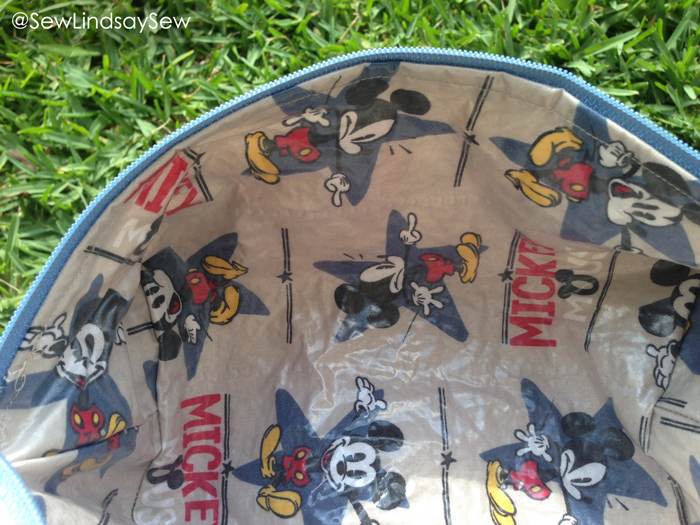
Given Joe’s love of all things Disney, I knew I’d hit the jackpot when I saw this Mickey Mouse fabric – masculine(ish), modern and magical. I knew that if Joe were right there in the fabric store with me, this is what he would have chosen! I also got to pick out a matching zipper – even though I have a ton of zippers in my stash, I needed 14″ for this project (much longer than what I already have on hand) which meant I got to shop in the zipper section for once – a rarity!

I’ve always wanted to try fusible vinyl, so I decided to use it on the lining for this project in hopes that it would protect the innards of the bag from any toiletry spills! It’s a pretty neat concept – just iron the stuff onto your fabric for a coated finish.

Using the vinyl made the fabric a little thicker, and a little more slippery to work with when I was actually sewing – but I’m glad I decided it use it. It makes the bag seem a lot fancier. However, I might think twice before using it in the future for projects that have so many seams that need to be pressed/turned because it really does add bulk. Fusible vinyl might be better for “flat” projects like aprons, bibs and placemats – that sort of thing. It also wrinkles really easily and is hard to smoothe back out. On a “flat” project, you’d be able to iron it again at the very end, but I couldn’t iron the lining of a boxy bag once it was finished.
Usually, this is where I would link to the tutorial I used. But for the first time, I really don’t want to promote the tutorial. It wasn’t the greatest experience and I actually stopped using it about halfway through the construction of the bag. I realized that there were going to be raw seams inside the bag when it was finished. And not just raw seams that would be tucked up in the corners of the bag that nobody would ever see – there was a huge seam going down the center of the lining. I really didn’t want to give someone a gift with raw seams inside. I stopped halfway through the “man bag” tutorial and did some more research before finding workarounds that would allow me to line the bag without raw seams. And while I was doing the secondary research, I found reasons to believe that the original tutorial I was using was almost directly lifted from another blog. Not cool!
Anyway, I suppose I should give a shout out to the second tutorial I found that helped me finish up the bag the way I’d wanted it to be all along! A huge thank you to The Boxy Bag tutorial on Slightly Befuddled – without it, I couldn’t have finished Joe’s “man bag!” I should have used this one from the start.

Photo and Tutorial Credit: Slightly Befuddled
At the last minute, I decided to throw together a little earbuds zipper pouch for Joe as well. I had a lot of Mickey fabric leftover, and I really wanted to make a matching “bonus'” accessory! Plus, I recently bought those little key rings in bulk from etsy, so there will be a lot of these little pouches in my future!

Joe loved his bag and is excited to use it for some of his upcoming travel adventures! And I was happy to have tried out yet another tutorial (although it got a little rocky there in the middle) and add another set of check marks to my sewing bucket list. Boxy “man bag” – check! Fusible vinyl – check!
Happy 30th Birthday, Joe!


Our son Greg and his wife met in the Disney College Program (from New Jersey and Kansas) and they now live in Orlando! 🙂 Love your project!
That is so fun to hear! It’s a small world after all. 😉 The Disney College Program truly impacted my life (and I guess your son and daughter-in-law can say the same!)
I love reading your post. It’s nice to hear the story’s behind your projects. Thanks for sharing.
Glad you enjoyed it. Thanks for following along!
What a cool story to go along with this project. Never knew they made fusible plastic.
We had such a good time with you in FL, Lindsay. Just sorry we missed seeing your Mom. Maybe we will be back in FL and we will make it a point to visit with both your parents, and hopefully you too. Thanks for all the help you are giving to Alicia on the the Disney college program. Hope she can do it.
Blessings, Mrs. K.
Pingback: Mother’s Day: nailed it! | Sew Lindsay, Sew!
Pingback: Pencil Bunting 101 | Sew Lindsay, Sew!
Pingback: Ninety-Nine and a Half | Sew Lindsay, Sew!
Pingback: A Cozy for Chris | Sew Lindsay, Sew!
Pingback: SEW ALL THE GIFTS! (Happy Birthday, Morgan) | Sew Lindsay, Sew!
Pingback: And the nominees are… | Sew Lindsay, Sew!
Pingback: In hot pursuit of an adventure: our experience at International Hot Glass | Sew Lindsay, Sew!
Pingback: Life on the rocks: Colorado Springs 2017 | Sew Lindsay, Sew!